Designs Systems are complex and difficult to wrap your head around, they're all based on different IA, have different token structures and so forth. Let's demystify them slightly, I'll start with a simple breakdown of design tokens.
What Are Tokens?
Design tokens are the reusable values that define the visual style of a product. They cover colours, typography, shadows, corner radii, spacing, and sizes. Instead of hardcoding values like #1E1E1E, tokens use semantic names such as ds-color-blue-500 or ds-radius-round.
Tokens bring:
Consistency: A single update cascades everywhere.
Scalability: One source of truth across iOS, Android, and Web.
Accessibility: Systematic handling of contrast, type scales, and spacing.
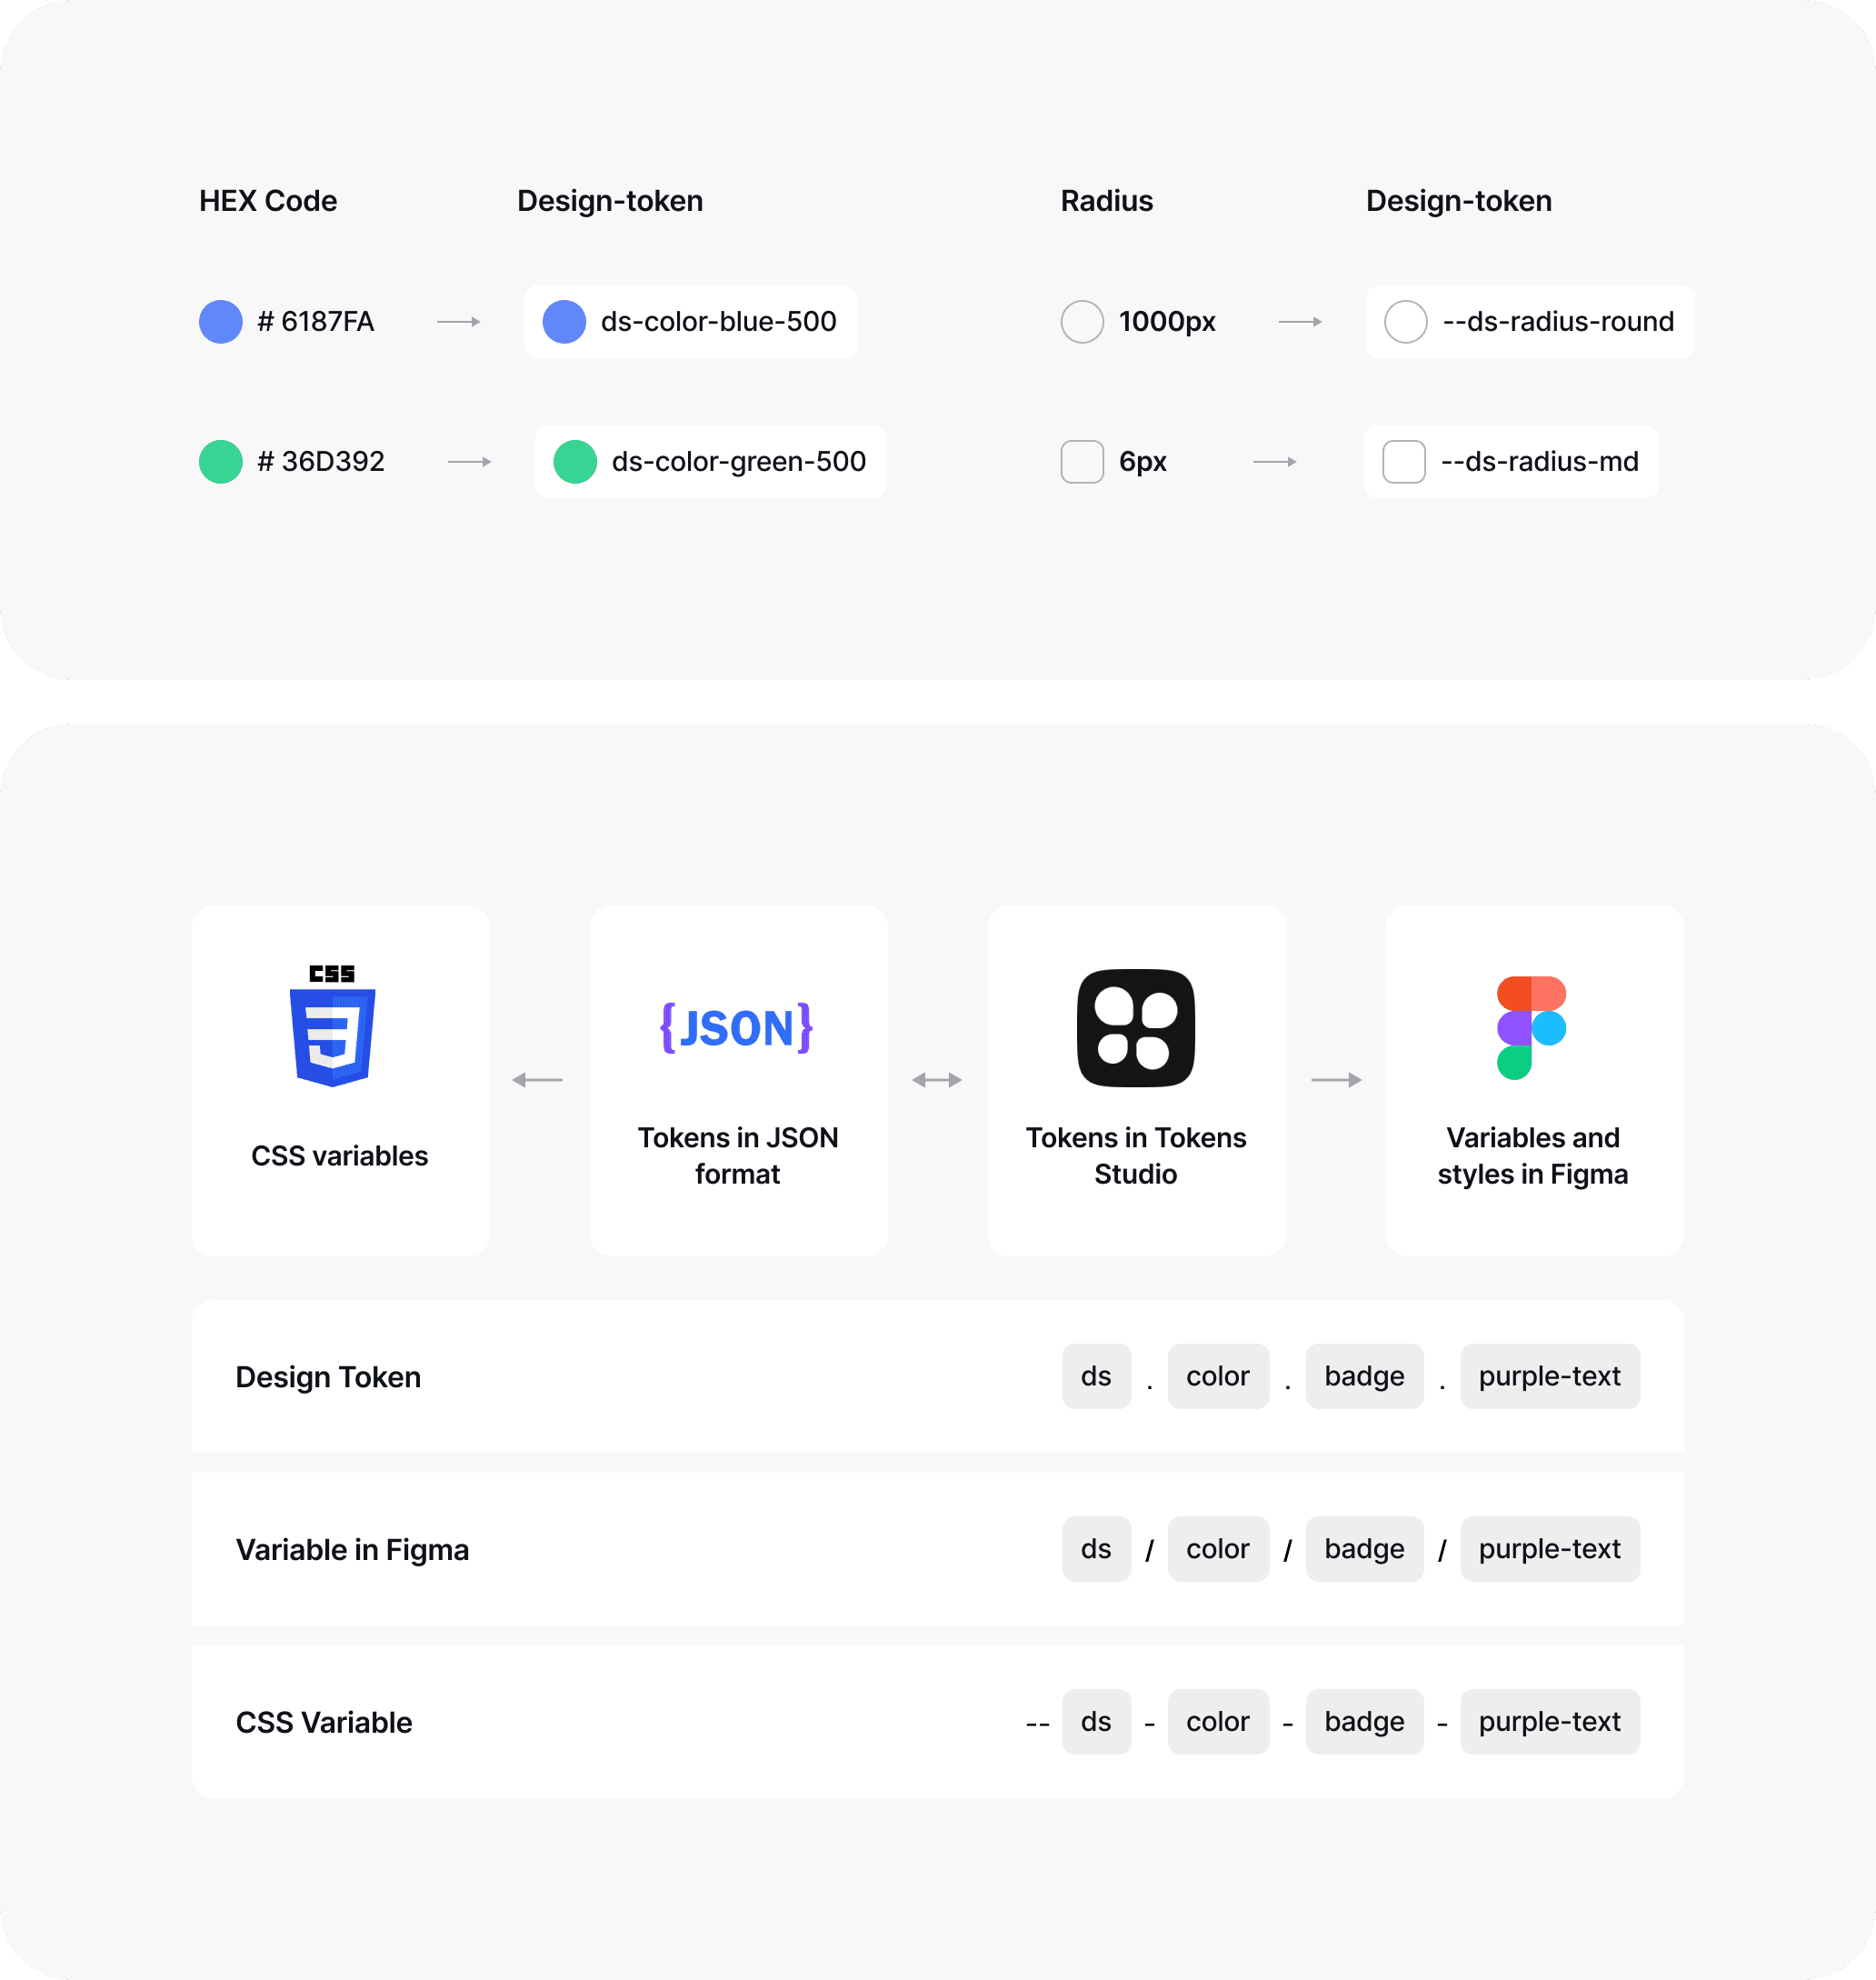
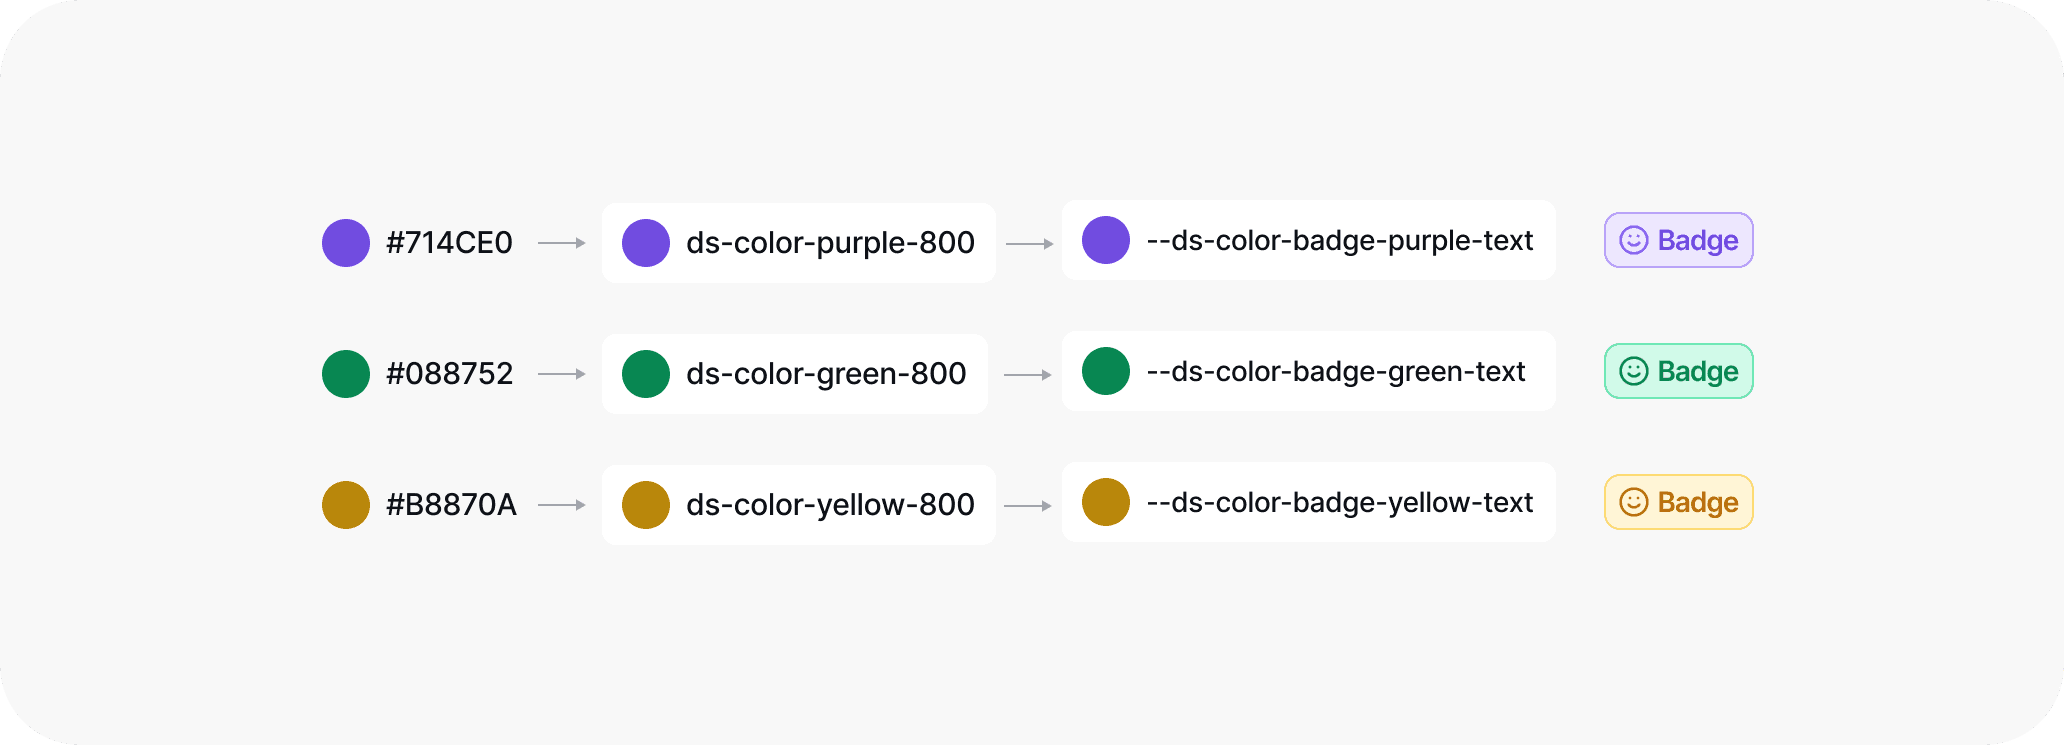
This badge component demonstrates how tokens drive styling. The text colour isn’t a hex code, it’s a token like ds-color-badge-purple-text If the base colour changes, the badge updates automatically. Tokens give components resilience and flexibility across different contexts.
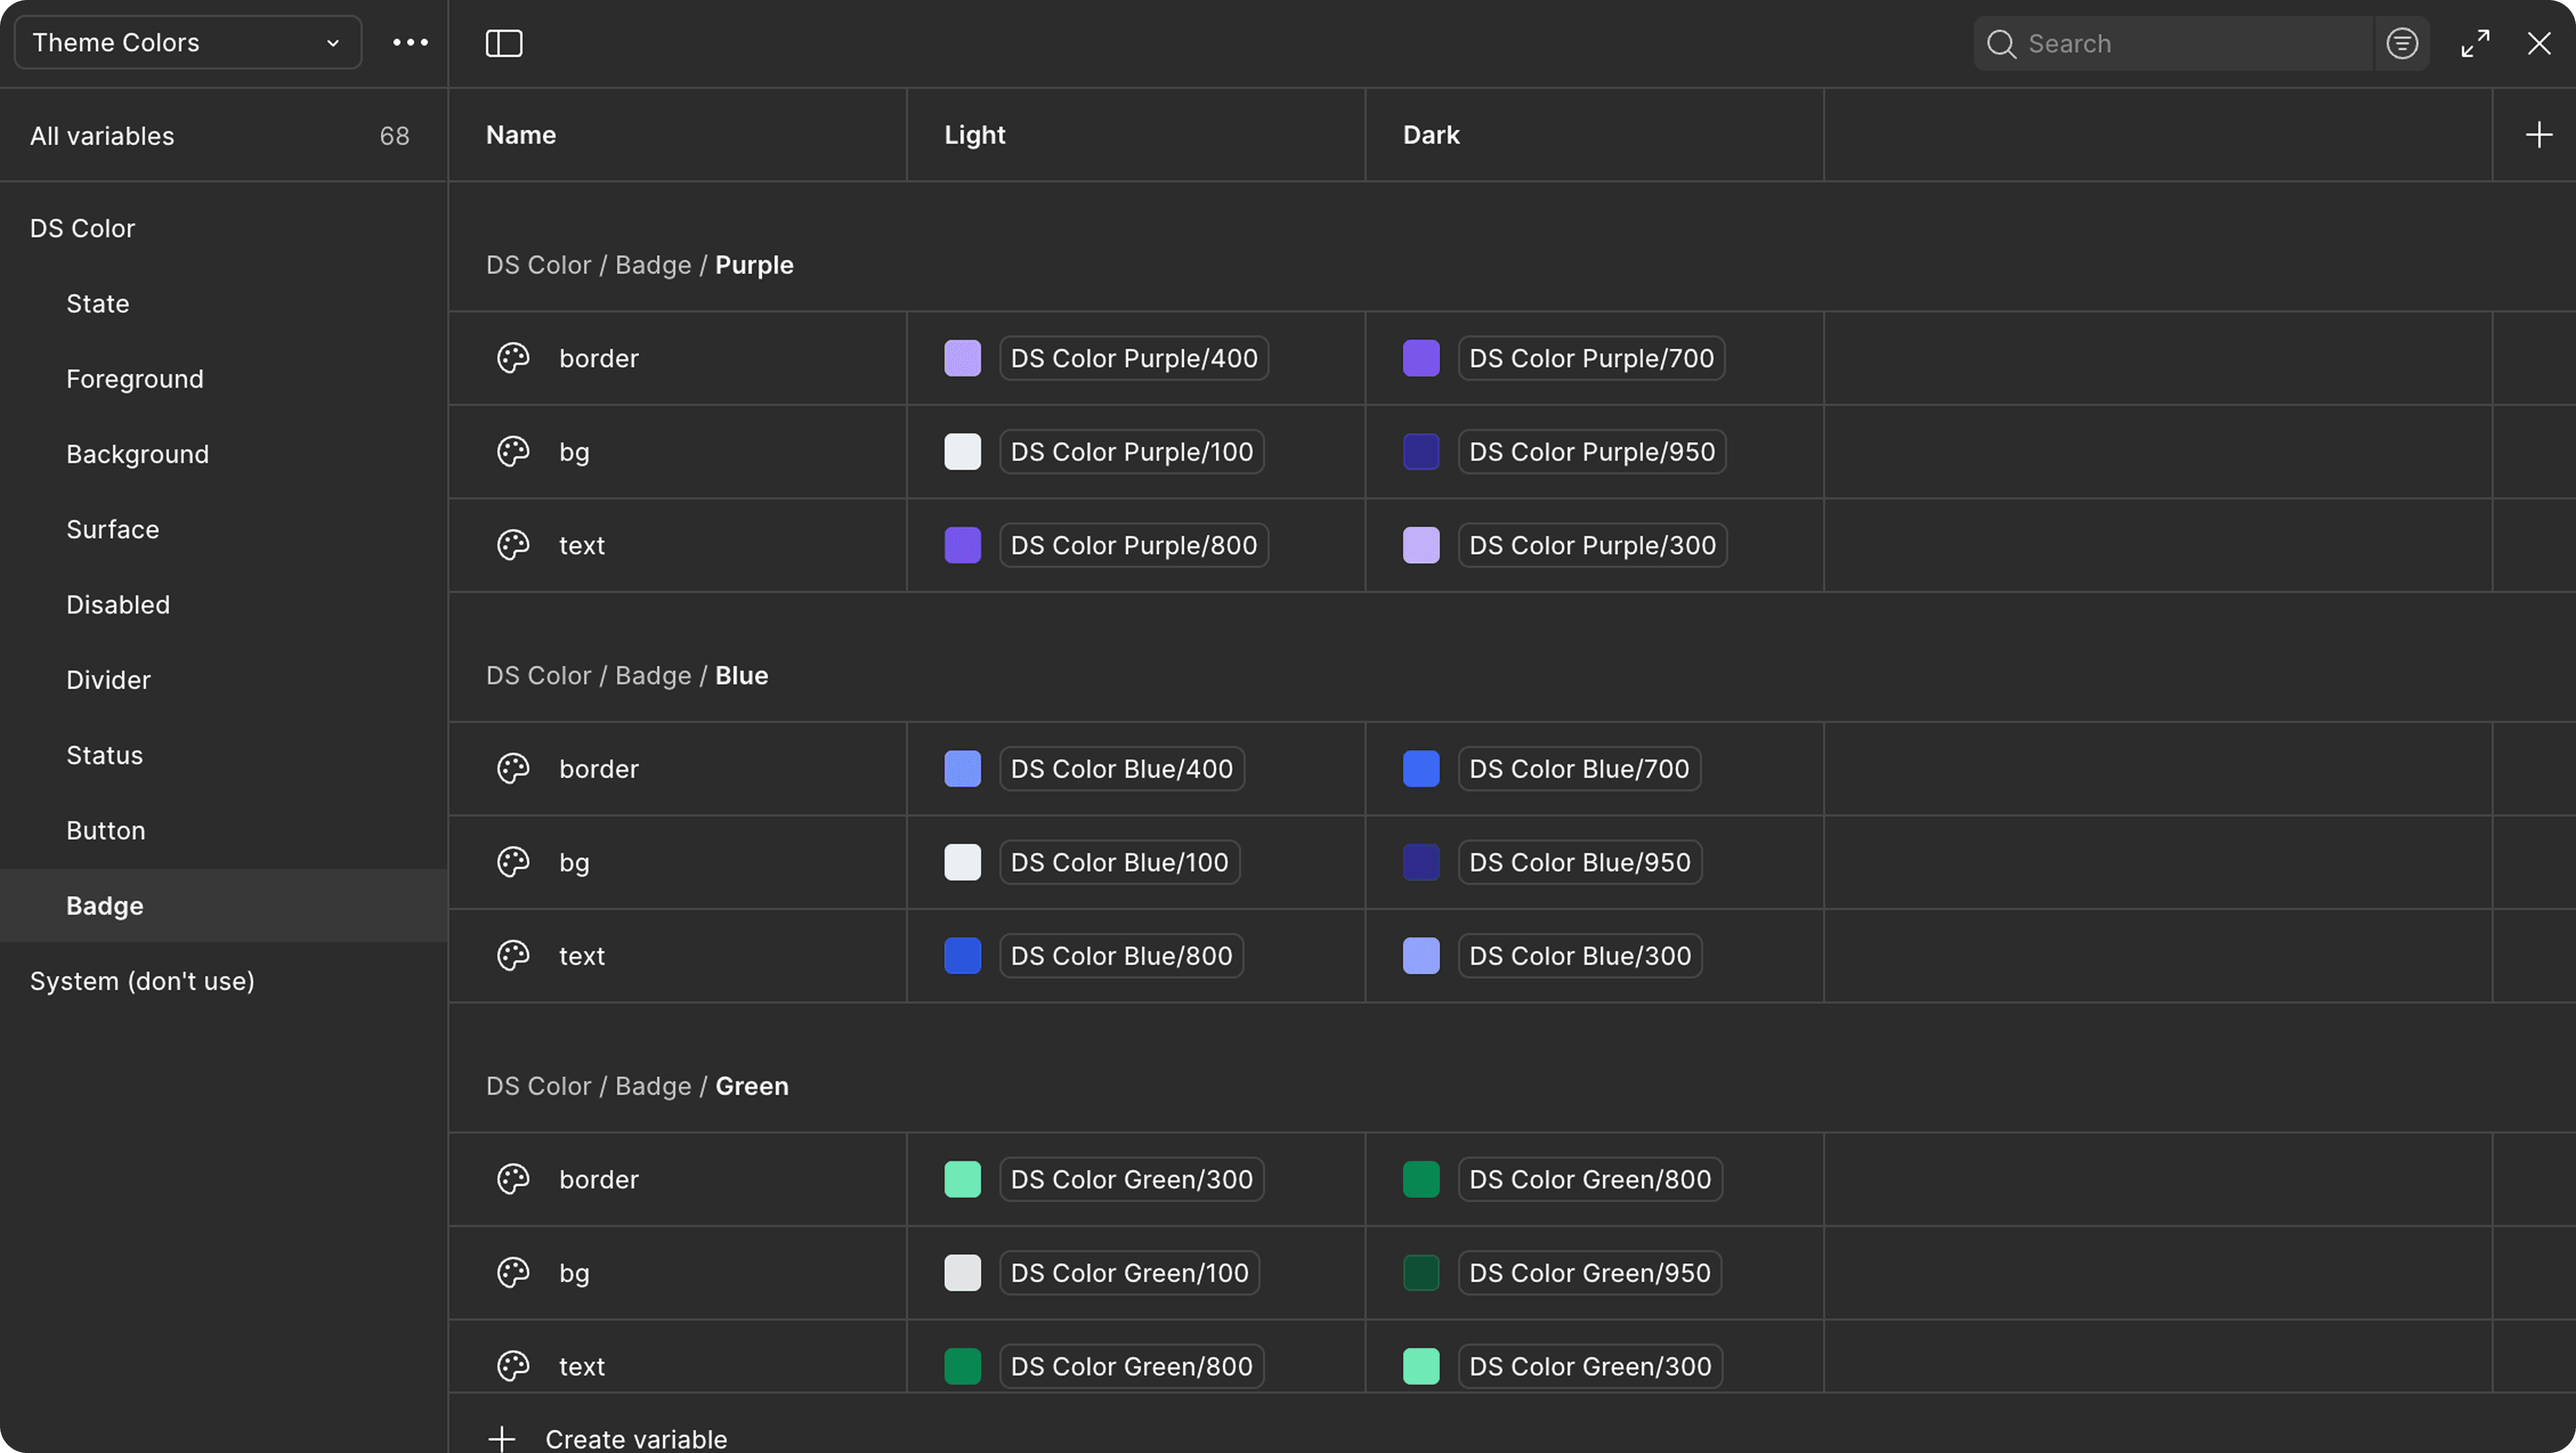
An essential step in tokenisation is defining variables. In Figma, this is done through Figma Variables, or with plugins like Tokens Studio for JSON export. Variables let you scope values to different contexts, for example, light and dark modes.
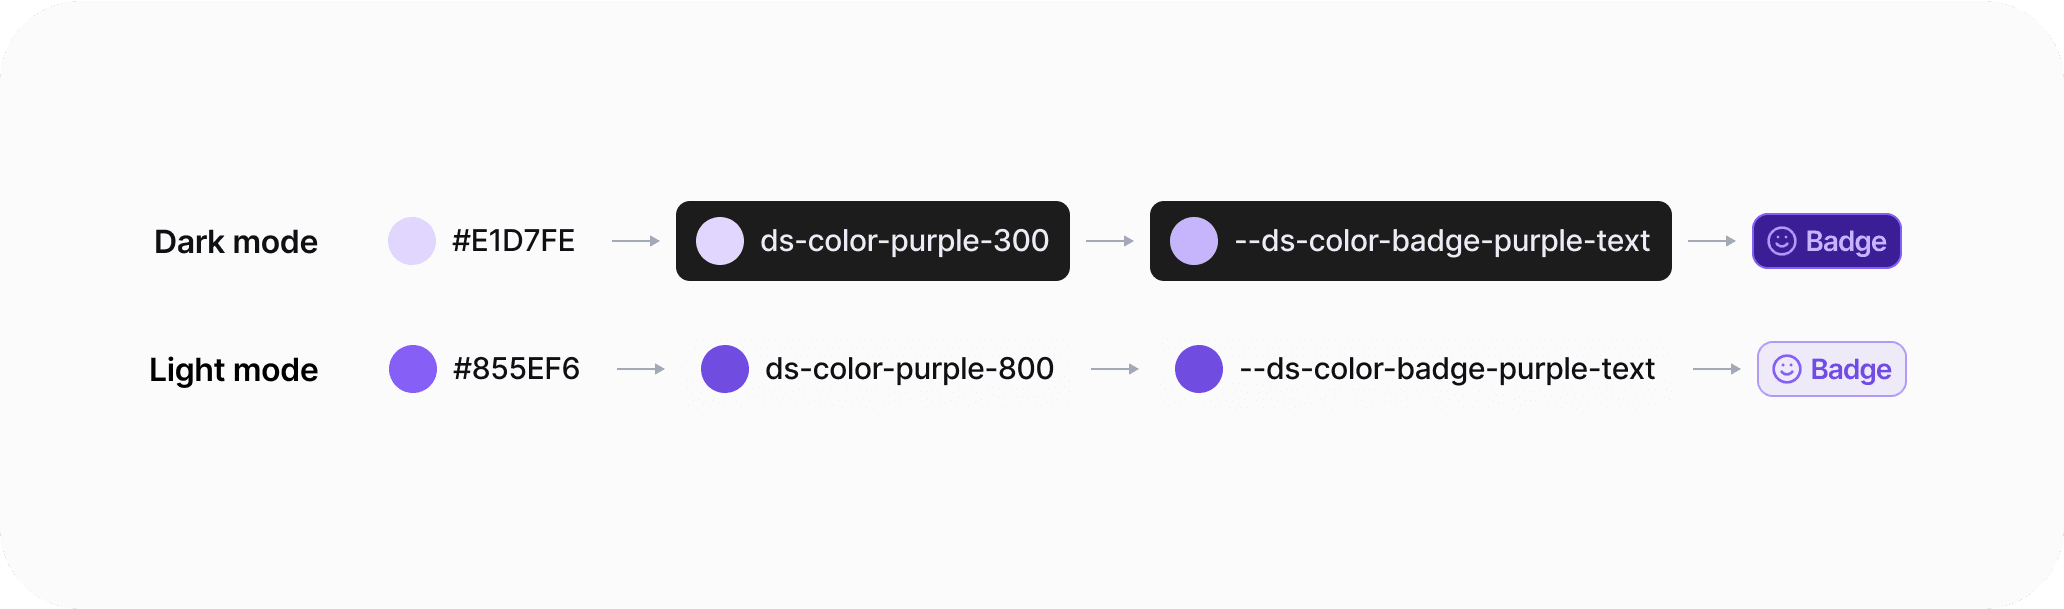
In the screenshot above, you can see how the same token role (badge-purple-text) has both a light and dark definition. Switching between modes in Figma applies the correct value instantly. Beyond light/dark, modern systems also include high-contrast accessibility modes, seasonal campaigns, or brand takeovers.
Setting Up Figma MCP
With the introduction of Figma MCP (Model Context Protocol) in Dev Mode, AI can now consume your design data directly. This unlocks workflows where a model like Claude CLI can generate code straight from your components.
Best practices for setup:
Keep raw components on a dedicated Figma page.
Avoid deep nesting in frames or groups.
Use Copy Link to Selection (⌘L) to grab a component link for Claude CLI.
Full Setup https://help.figma.com/hc/en-us/articles/32132100833559-Guide-to-the-Dev-Mode-MCP-Server

Using Claude CLI
Once MCP is enabled, Claude CLI can process a component link from Figma. For example, you might select the badge component, copy its link, and then ask Claude CLI to generate a React/TypeScript component.

Next steps are simply to ask it to build a React component using the tokens that you have applied to the component in Figma. Once it’s completed you can verify that it has implemented the tokens using software like Cursor or VScode.
Why This Matters in 2025
The convergence of design and AI-assisted coding is no longer a future vision — it’s happening now.
Design ↔ Dev convergence: AI workflows like MCP + Claude reduce friction in handoff.
Enterprise adoption: Atlassian, Shopify, and Airbnb are scaling systems with token pipelines.
Accessibility by default: Tokens now support WCAG 2.2 standards for colour, motion, and type scaling.
Multi-brand scaling: Products spanning multiple brands or regions rely on tokenised systems to stay consistent.